
 nl
 en

Shoxl order confirmations with Zapier and Postmark - Blog
Published: Tuesday 22 September 2020
By using external packages for email design and delivery, you keep full control over the layout of every email your shop generates. This post describes how this works in practice with the combination of Vendisto, Zapier and Postmark.

A JSON message as the basis
When an order is created, there are several ways to send an order confirmation:
- Sent by the shop
- Sent by Vendisto
- Sent by the connected ERP system
When the shop sends the confirmation, it does so by sending a fully formatted email that is passed to Postmark. Postmark acts as the mail server here.
An alternative is to send the order data in JSON format to a Postmark template.
Postmark has several standard templates that are fully tested for compatibility with all major email applications. You can also use templates you code yourself.
To map JSON elements to template elements, Postmark uses a simple template language, Mustachio.
At the moment the shop cannot yet send JSON instead of a complete email. Vendisto can, and in several ways.
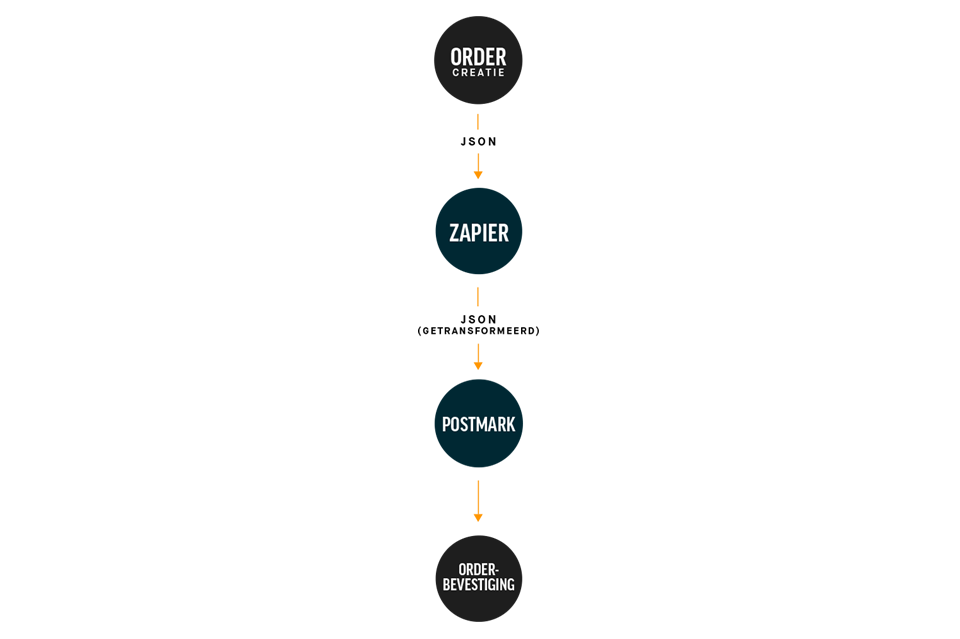
Options for creating a JSON message in Vendisto
In the “Settings / Documents” section you can specify, for each change in an order's status, what communication should happen at that point. You can choose between sending an email, sending a file to an email address and posting a message to an endpoint. This message can be formatted in either XML or JSON.
The order confirmation message is created when an order is confirmed. This can be done manually, by clicking the Confirm button in Vendisto, or automatically, when Vendisto is set to confirm incoming orders automatically (Settings / Vendisto / Processing Rules / Auto Confirm Orders).
The JSON order confirmation message can also be produced with the REST Webhook for Orders. External services can use it to subscribe to a JSON message whenever the Order Confirmation event occurs.
JSON messages can be sent directly to a service such as Postmark. The drawback of this method is that the message will often need to be transformed to meet the requirements of the receiving service. That requires programming skills. But it can also be done without programming skills, using Zapier.
Zapier can be connected to Vendisto in two different ways.
The first option is to create a webhook in Zapier with the trigger “Webhooks by Zapier”. You can then enter the URL that Zapier generates in Vendisto, in the section “Settings / Documents / Order Confirmation / Post file to external URL”.
The second option is to use a Shoxl Trigger. The Shoxl Trigger uses the Vendisto Order REST Webhook. Shoxl triggers are currently available by invitation; contact Shoxl if you would like to use them.
We assume the second option. Creating an order confirmation message through Zapier then works as follows.
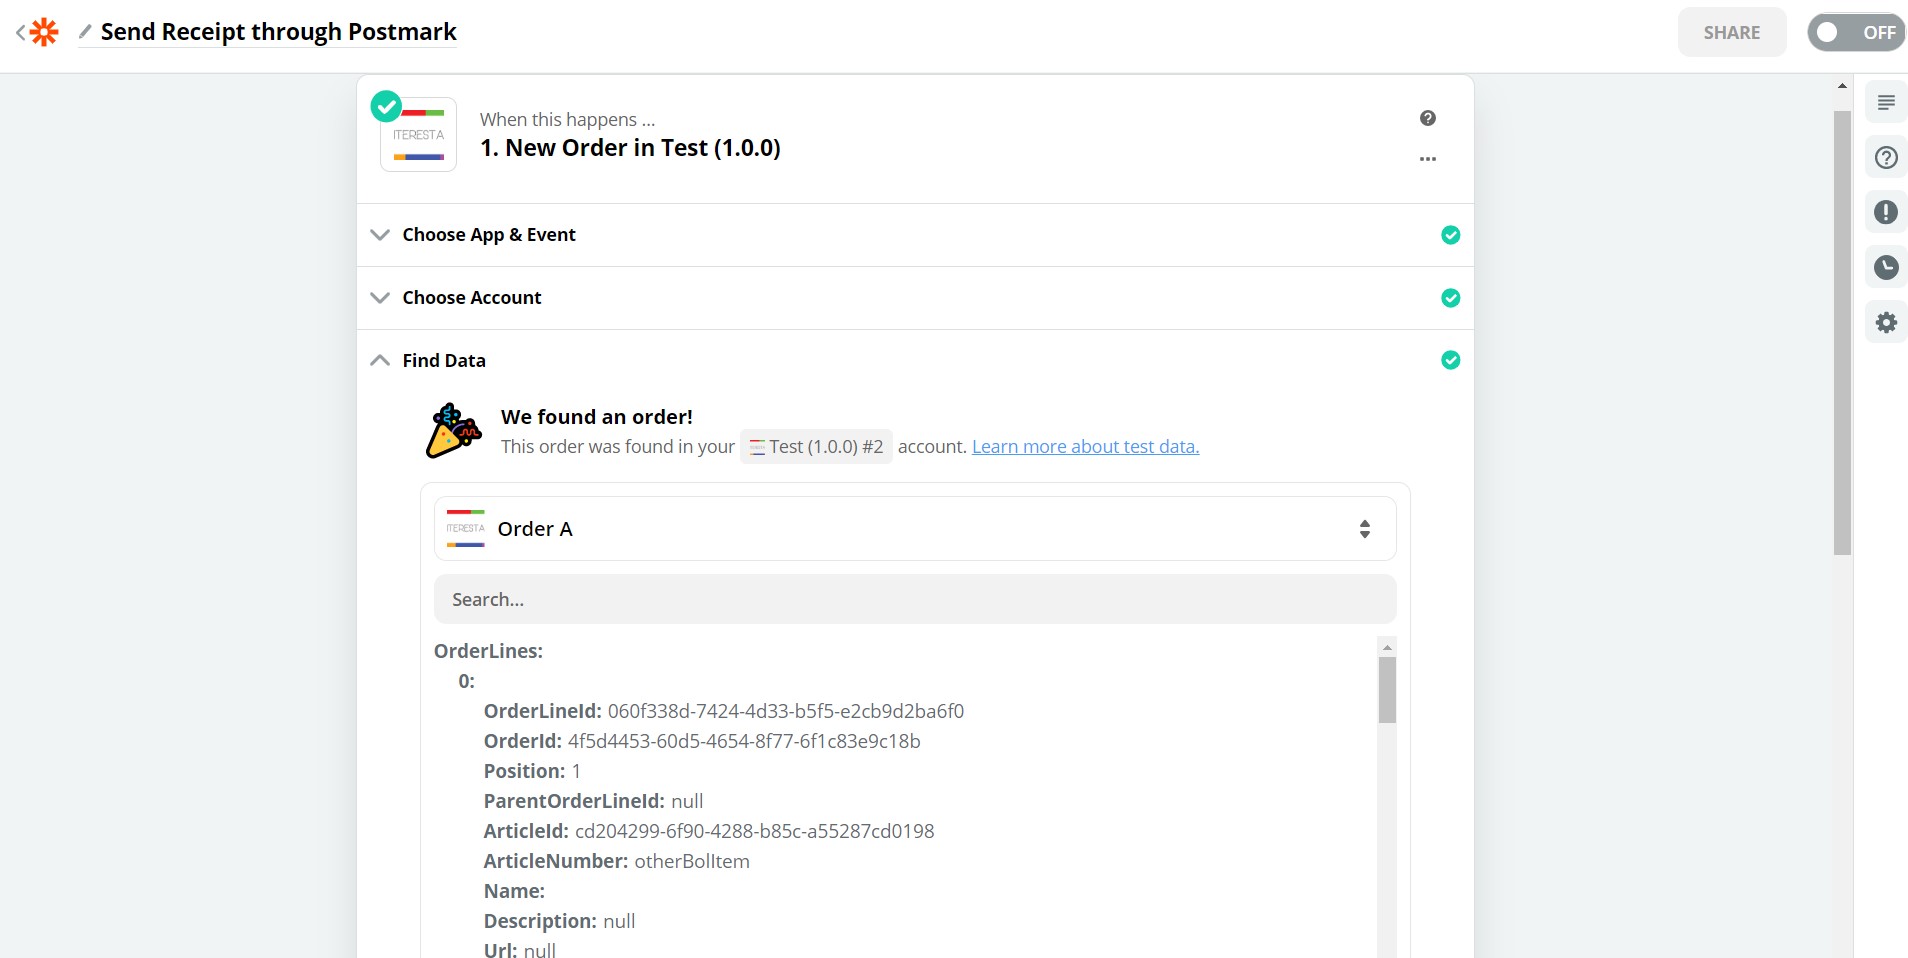
Step 1: Create a Zap in Zapier
Trigger: Shoxl New Order. The incoming data looks like this:
Step 2: Edit the JSON data
The Shoxl integration with Zapier supports order lines, but the Postmark integration does not. Zapier interprets the incoming JSON and converts it into separate Orderlines. These Orderlines then have to be converted into a format Postmark understands. Zapier offers tools for this under Formatter > Utilities.
Step 3: Post data from the Zap to Postmark
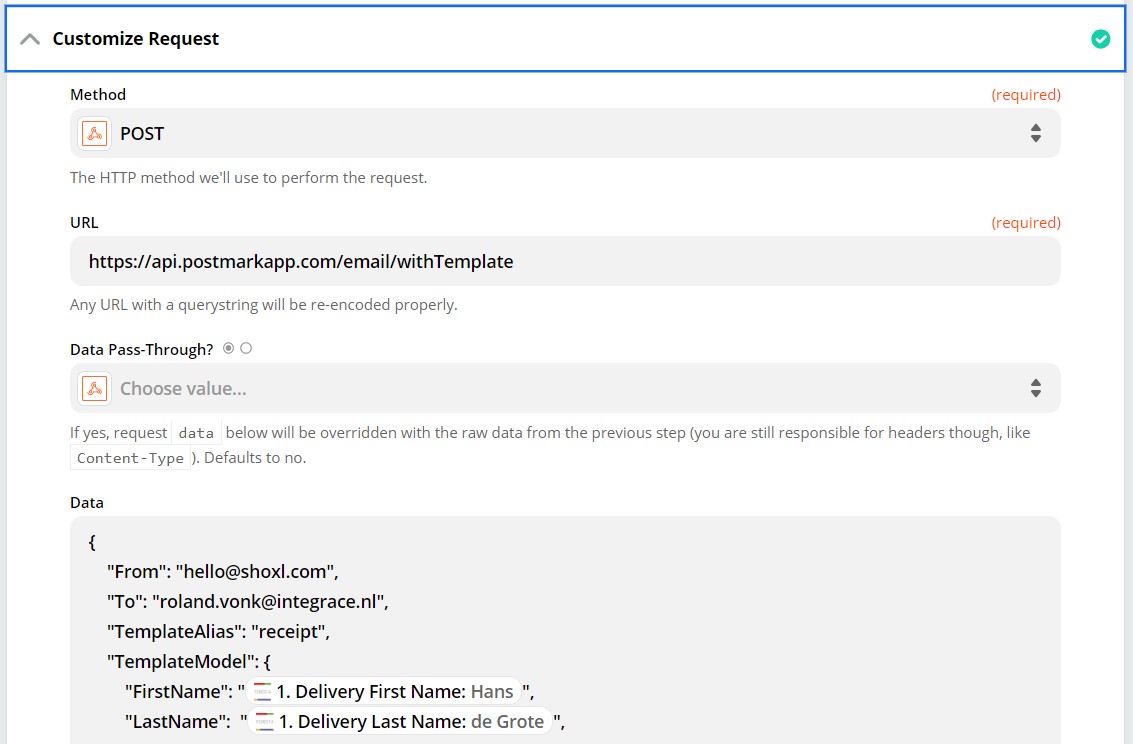
Several standard integrations between Zapier and Postmark are available. They all work fine for simple emails without iterations. For emails with iterations (several order lines), however, you need to use the general Zapier app, Webhooks by Zapier. With it you can post data to the Postmark API using a Custom Request.
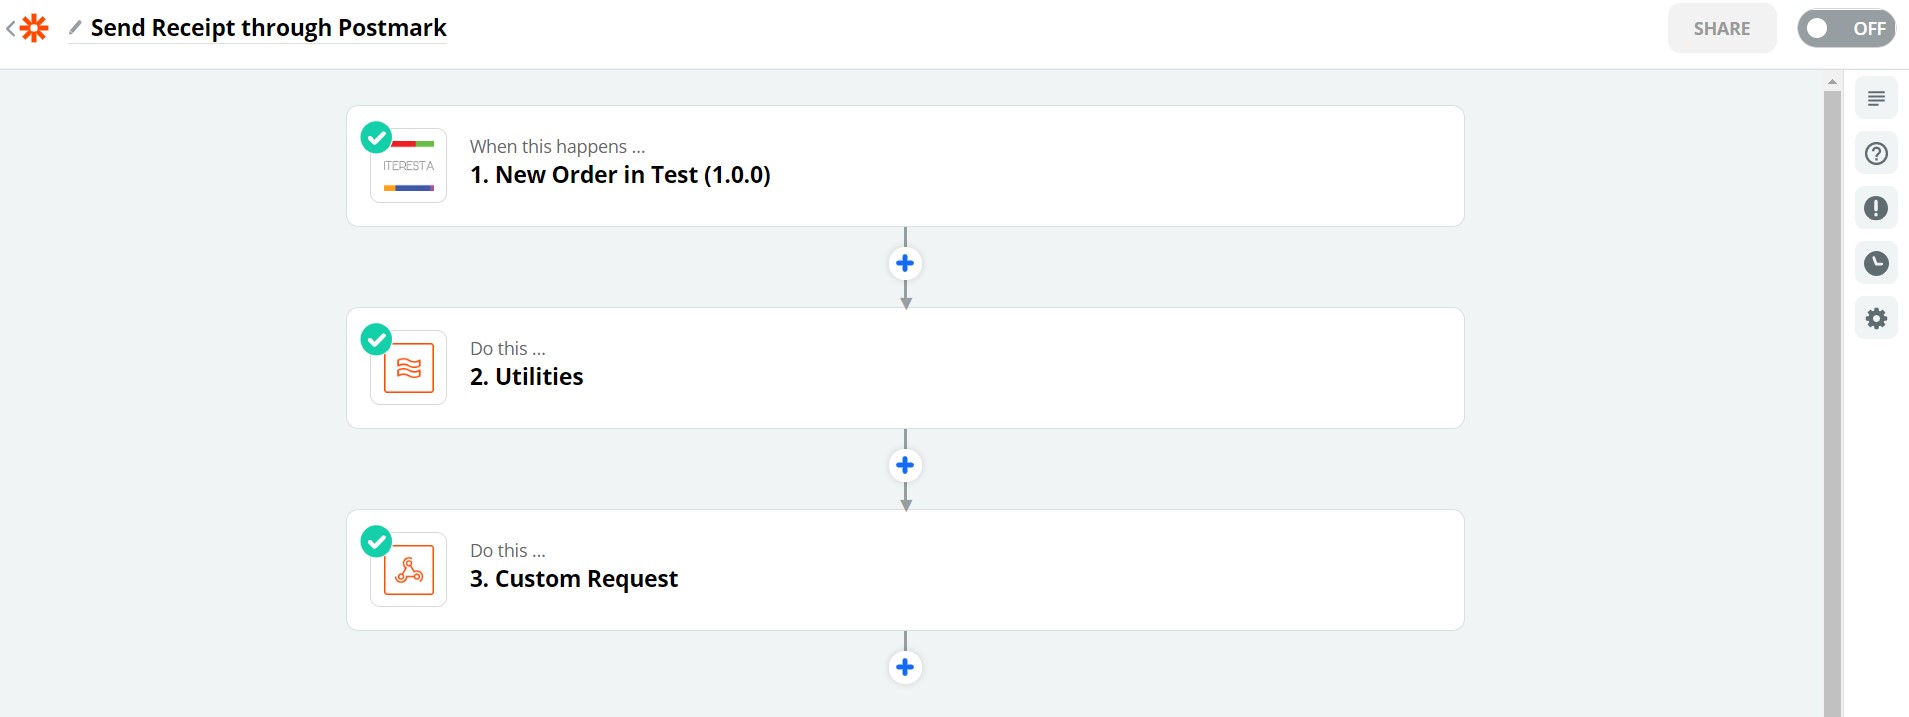
Summary: Zap overview
So a simple Zap looks like this
Step 4: Check the posted data (optional)
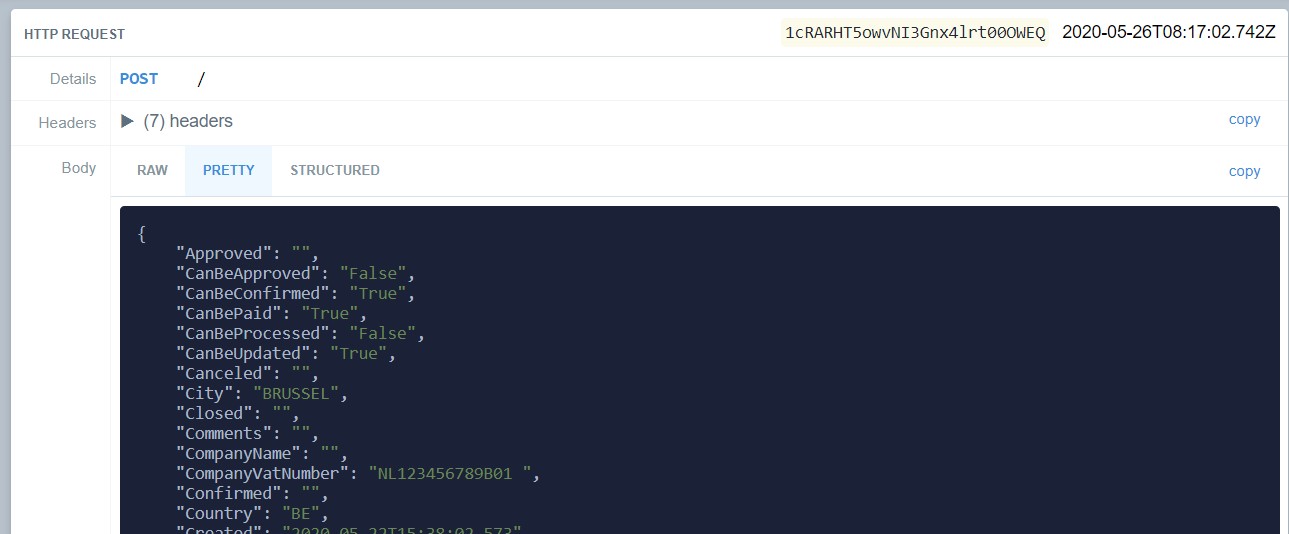
To check the data properly, you can first post it to a Requestbin endpoint created for this purpose.
Step 5: Create a template
…. in Postmark
Setting up responsive emails is laborious and complex. It is best to use one of the available standard templates.
When setting up the template, it helps to keep the variable names the same as in the JSON supplied.
To handle repeating order lines, you can use the Mustachio features for this. Syntax of the “for each” loop: {{#each order_details}} order line {{/each}}
.. or with an external tool
The Postmark templates are relatively simple. There are many alternatives on the market, however. Some of them come bundled with a visual editor for adjusting the template. In fact, any editor can be used, as long as it can export the HTML.
In emails, CSS must always be placed inline; if the editor cannot deliver it that way, this can be done with a service such as https://templates.mailchimp.com/resources/inline-css/
StampReady offers a good builder. Many templates are available for it as well, for example on ThemeForest.
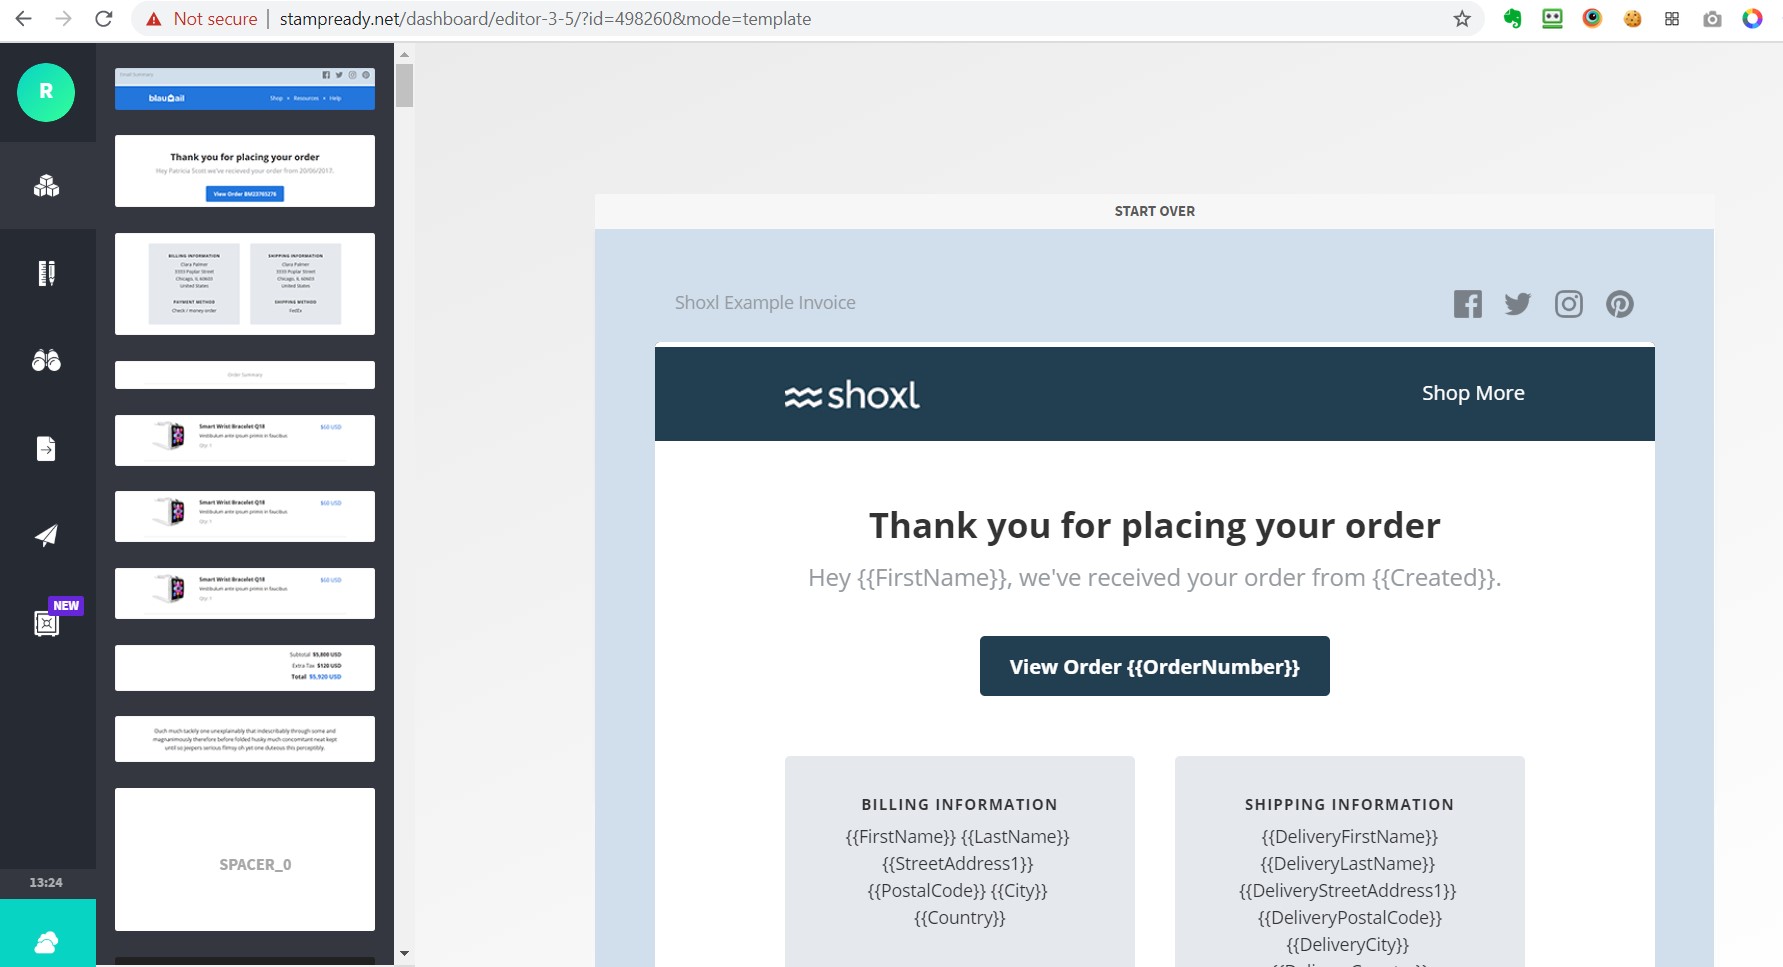
Once the template is set up, the HTML can be exported. You may then still need to add the required “for each” loops to this HTML, as these typically cannot be defined in the editor.
Sending with tools other than Postmark
Besides Postmark there are several other popular tools for sending transactional emails, such as SendGrid and Mailchimp (Mandrill). They all work in much the same way as described here.
For all of these packages, integration through Zapier offers little or no support for transactional emails with multiple lines; for those you will typically always need to use the regular API and a regular Post from Webhooks by Zapier. SendGrid offers a template language similar to Postmark's for this: Handlebars.